Reading time: 4 minutes | Difficulty: Beginner
Overview
Create dedicated, shareable payment pages with custom URLs. This guide covers enabling and configuring standalone payment pages.
Prerequisites
- A payment form created
- Understanding of your branding needs
What is a Payment Page?
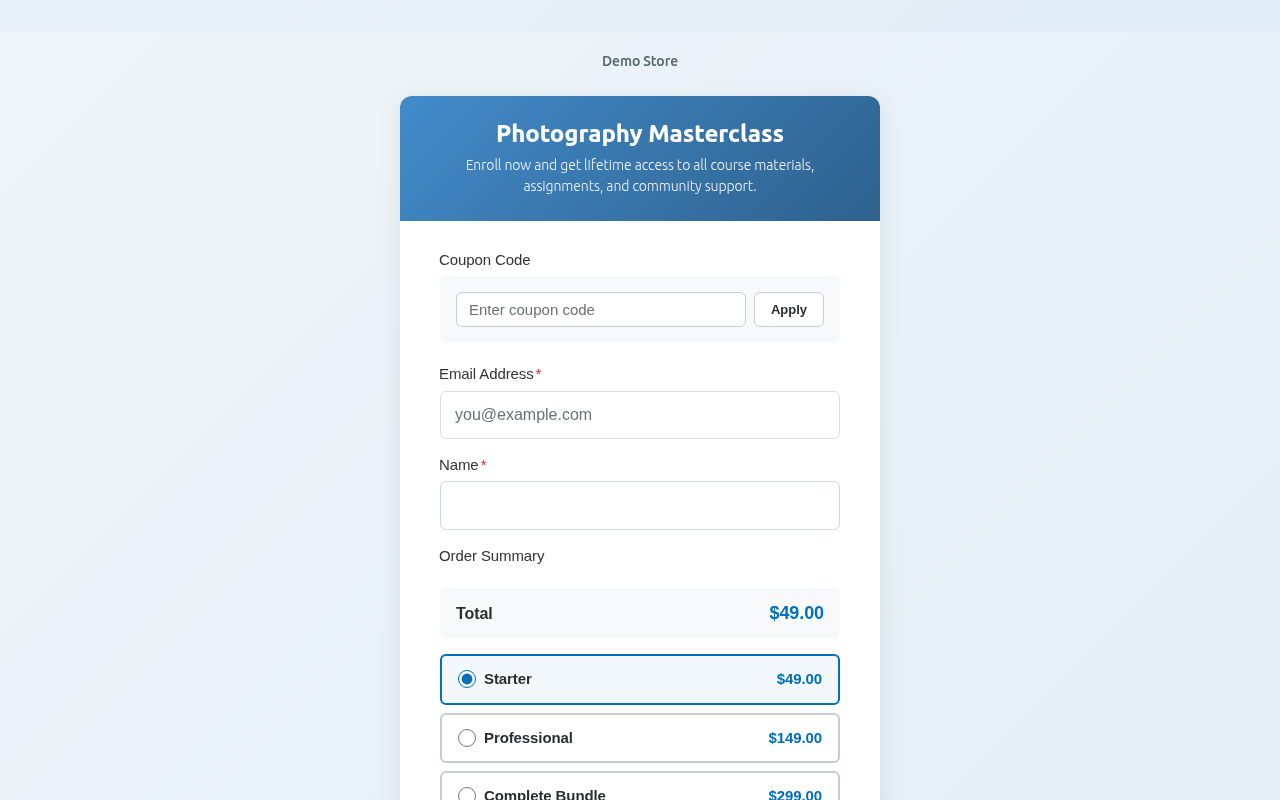
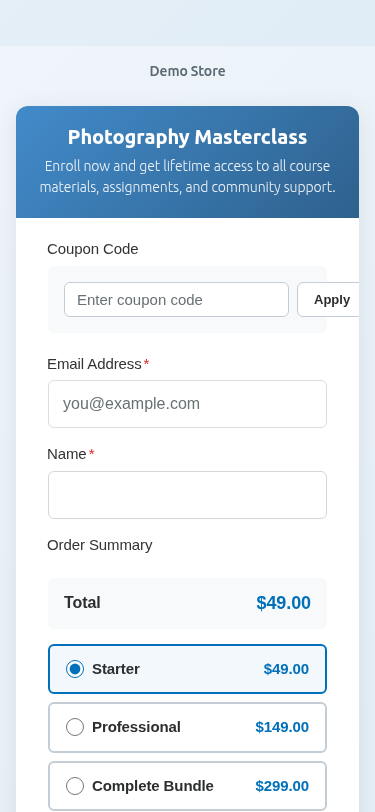
A Payment Page is a standalone, full-page checkout experience at a custom URL:
https://yoursite.com/pay/your-product/Unlike embedded forms, Payment Pages:
- Have dedicated URLs
- Feature full-page branding
- Work great for sharing
- Require no embedding
Accessing Payment Page Settings
- Edit your payment form
- Click the Payment Page tab
Step 1: Enable Payment Page
- Toggle Enable Payment Page on
- The settings panel expands
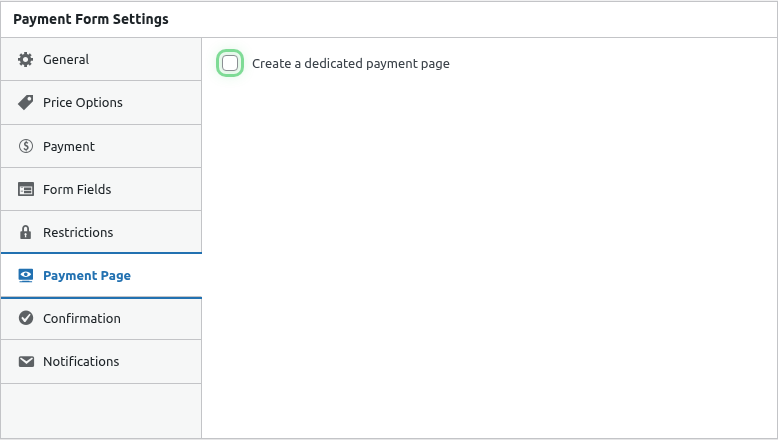
Once enabled, you’ll see all the payment page settings:
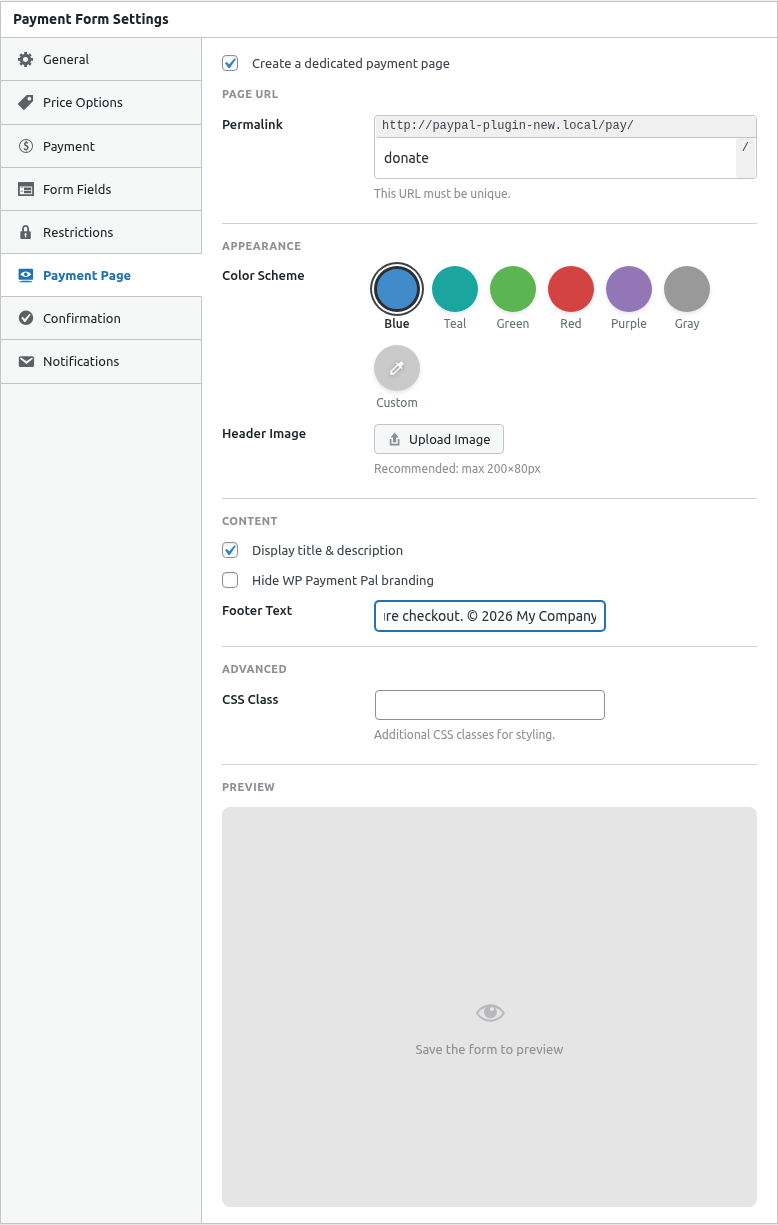
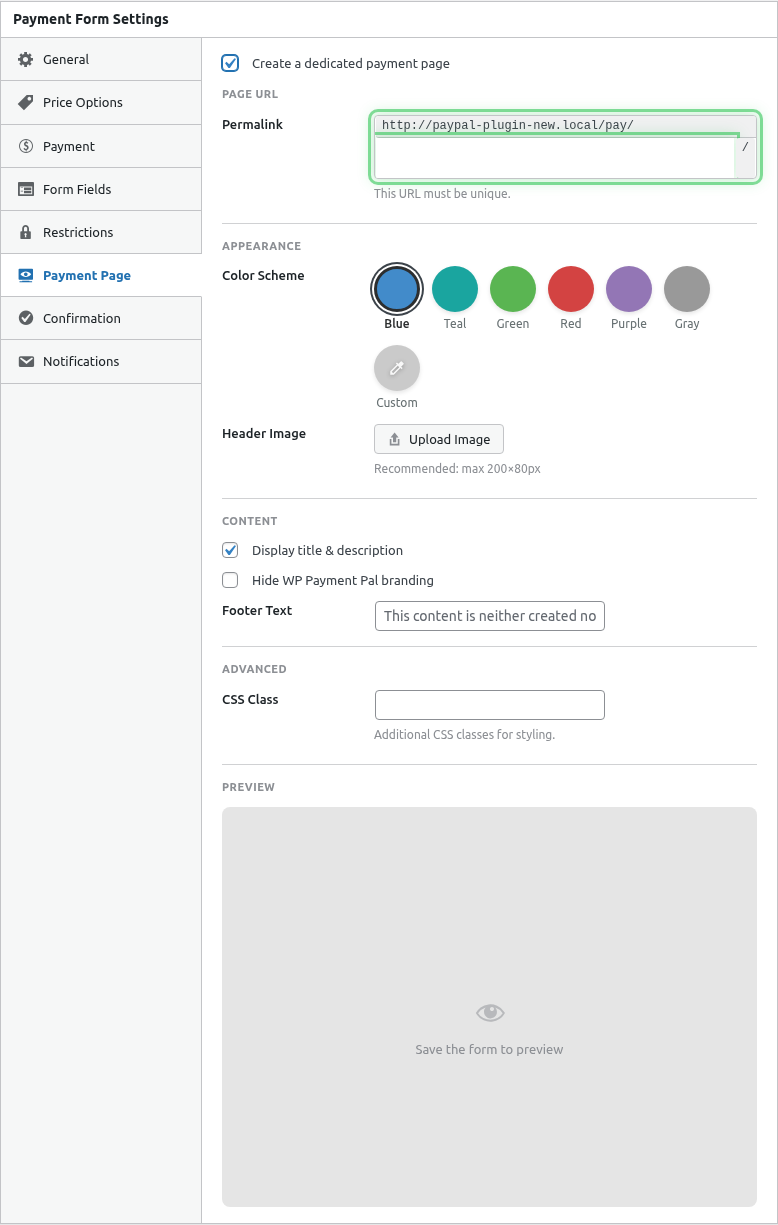
Step 2: Set the URL Slug
- Enter your desired URL Slug
- Keep it short and memorable
- Use lowercase letters, numbers, and hyphens
Example with “donate” filled in:

Slug Examples
| Slug | Full URL |
|---|---|
donate |
/pay/donate/ |
membership |
/pay/membership/ |
workshop-2024 |
/pay/workshop-2024/ |
consulting |
/pay/consulting/ |
Slug Best Practices
- Short: Easy to type and remember
- Descriptive: Indicates what the payment is for
- Lowercase: Avoid confusion
- No spaces: Use hyphens instead
Step 3: Configure Branding
Customize your payment page appearance:
| Setting | Purpose |
|---|---|
| Logo | Your brand logo |
| Background Color | Page background |
| Footer Text | Optional footer content |
See detailed guides:
Step 4: Save and Preview
- Click Publish or Update
- Click the preview link or visit your URL
- Test the full experience
Live Preview
The Payment Page editor includes a real-time preview:
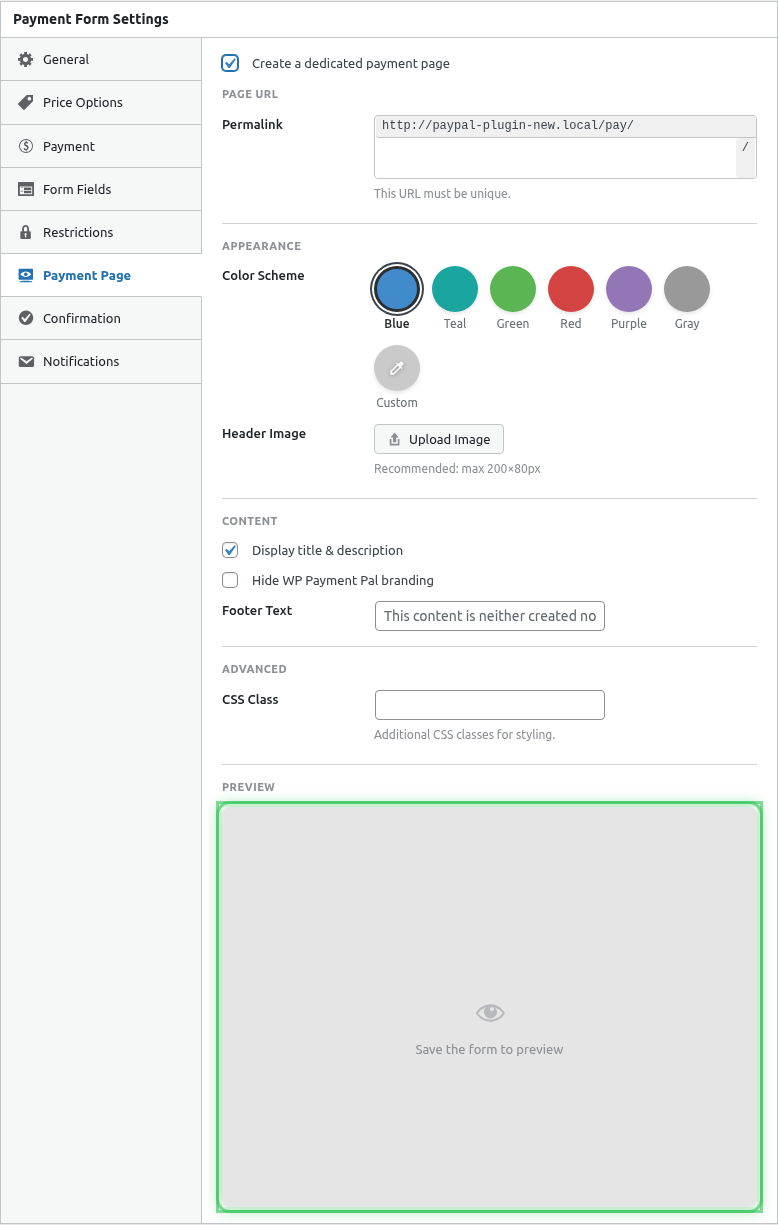
The preview updates as you:
- Change colors
- Upload logo
- Modify text
Using Your Payment Page URL
Direct Linking
Share the URL directly:
https://yoursite.com/pay/donate/In Emails
Click here to donate: https://yoursite.com/pay/donate/Social Media
Post the link on social platforms.
QR Codes
Generate a QR code linking to your payment page for:
- Print materials
- In-store displays
- Business cards
- Event signage
URL Prefix
The default prefix is pay:
/pay/your-slug/To change the prefix globally:
- Go to WP Payment Pal > Settings
- Find Payment Page Prefix
- Enter new prefix (e.g.,
checkout)
New URLs:
/checkout/your-slug/Mobile Experience
Payment Pages are fully responsive:
Mobile features:
- Touch-friendly interface
- Responsive layout
- Mobile-optimized PayPal buttons
- Easy form filling
Payment Page vs Embedded Form
| Feature | Payment Page | Embedded |
|---|---|---|
| Dedicated URL | ✓ | ✗ |
| Full branding | ✓ | Limited |
| Shareable link | Easy | Requires page URL |
| Within content | ✗ | ✓ |
| Theme integration | Standalone | Inherits theme |
Use Cases
Donation Link
URL: /pay/donate/
Purpose: Share on social, email campaigns
Branding: Nonprofit colors and logo
Invoice Payment
URL: /pay/invoice-12345/
Purpose: Send to client for payment
Branding: Business branding
Event Registration
URL: /pay/summer-conference/
Purpose: Share in promotions
Branding: Event theme
Product Launch
URL: /pay/new-product/
Purpose: Direct sales link
Branding: Product-specific
Multiple Payment Pages
Each form can have its own Payment Page:
- Different products = different pages
- Different campaigns = different pages
- Each with unique branding
Disabling Payment Page
To disable a Payment Page:
- Edit the form
- Go to Payment Page tab
- Toggle Enable Payment Page off
- Save the form
The URL will return 404 after disabling.
SEO Considerations
Payment Pages:
- Are indexable by default
- Can add noindex if preferred
- Should have descriptive titles
- Use your SSL certificate (required for payments)
Security
Payment Pages include:
- SSL requirement (HTTPS)
- PayPal’s secure payment processing
- No sensitive data stored on page
- Standard WordPress security
Troubleshooting
Page shows 404
- Verify Payment Page is enabled
- Check slug is set
- Flush permalinks (Settings > Permalinks > Save)
- Check for slug conflicts
Page looks wrong
- Clear browser cache
- Check theme conflicts
- Verify settings saved properly
Can’t access in some browsers
- Ensure HTTPS is working
- Check for JavaScript errors
- Test without browser extensions
What’s Next?
- Customizing Payment Page Colors – Color schemes
- Adding a Logo to Payment Pages – Branding
- Customizing Payment Page Layout – Layout options