Reading time: 3 minutes | Difficulty: Beginner
Overview
Add your brand logo to standalone payment pages for professional, branded checkout experiences. This guide covers logo upload and configuration.
Prerequisites
- A payment form with Payment Page enabled
- Your logo file ready (PNG, JPG, or SVG)
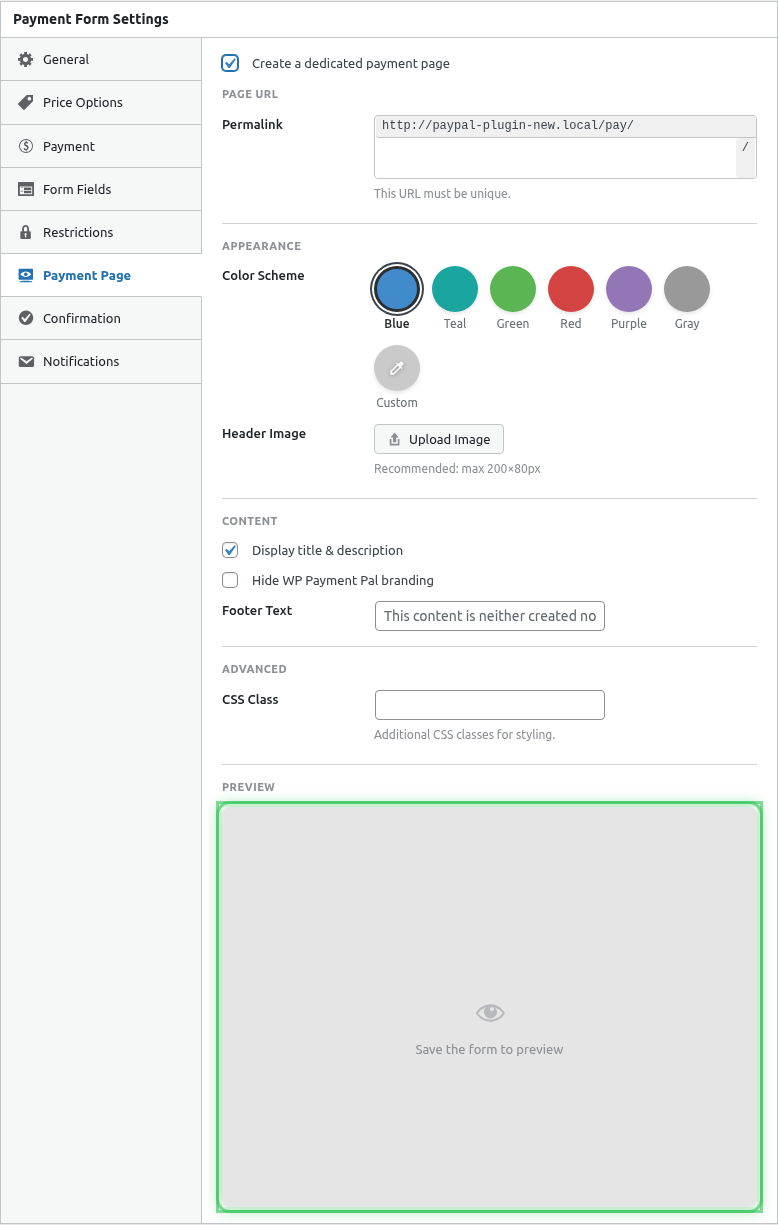
Accessing Logo Settings
- Edit your payment form
- Click the Payment Page tab
- Find the Logo section
Step 1: Upload Your Logo
- Click Upload Logo or Select Image
- Upload a new image or choose from Media Library
- Click Select or Insert
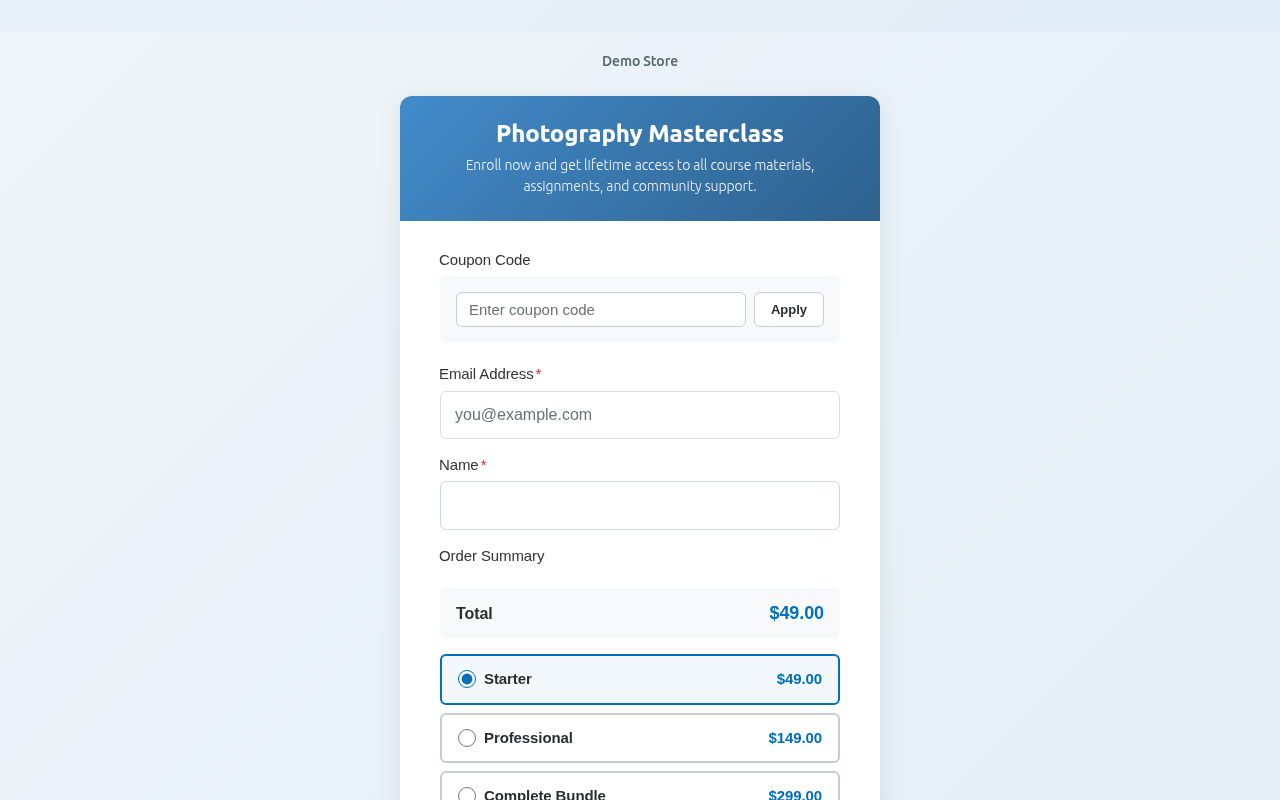
Step 2: Preview
Your logo appears in the live preview:
The logo displays above the payment form.
Step 3: Save
- Verify logo looks correct
- Click Publish or Update
Logo Requirements
Recommended Specifications
| Property | Recommendation |
|---|---|
| Format | PNG (transparent) or SVG |
| Width | 200-400 pixels |
| Height | Auto (maintain ratio) |
| Background | Transparent preferred |
| File size | Under 500KB |
Aspect Ratios
| Logo Type | Aspect Ratio | Notes |
|---|---|---|
| Horizontal | 3:1 to 4:1 | Wide logos work best |
| Square | 1:1 | Will appear smaller |
| Vertical | 1:2 | May be too tall |
Logo Placement
The logo appears:
- Centered above the form
- Against the background color
- At a reasonable size
Logo and Background Color
Consider how your logo looks against the background:
Light Logo + Dark Background
✓ Good contrast
✓ Logo stands out
Example: White logo on teal background
Dark Logo + Light Background
✓ Good contrast
✓ Professional appearance
Example: Navy logo on light gray
Logo with Transparency
- Transparent PNGs adapt to any background
- Consider logo colors vs background
- Test different color combinations
Multiple Versions
Consider creating logo versions:
- Light version – For dark backgrounds
- Dark version – For light backgrounds
- Universal – Works on any background
Use the appropriate version for each payment page’s color.
No Logo Option
Payment pages work without logos:
- Form title displays prominently
- Clean, minimal appearance
- Useful for quick setups
To remove a logo:
- Click Remove or Clear
- Save the form
Logo Best Practices
Do
- Use high-resolution images
- Choose transparent backgrounds
- Test on multiple devices
- Match to your brand guidelines
- Keep file sizes small
Don’t
- Use blurry or pixelated images
- Include excessive whitespace
- Use logos that clash with background
- Upload extremely large files
SVG Logos
SVG files offer advantages:
- Infinitely scalable
- Small file size
- Crisp on all devices
- Transparent by default
To use SVG:
- Ensure WordPress allows SVG uploads
- Upload SVG file
- Select for your payment page
Note: Some security plugins block SVG uploads.
Retina/HiDPI Support
For crisp logos on high-resolution screens:
- Upload at 2x the display size
- Example: If logo displays at 200px wide, upload 400px
Testing Your Logo
Desktop View
Check:
- Logo is sharp and clear
- Appropriate size
- Visible against background
Mobile View
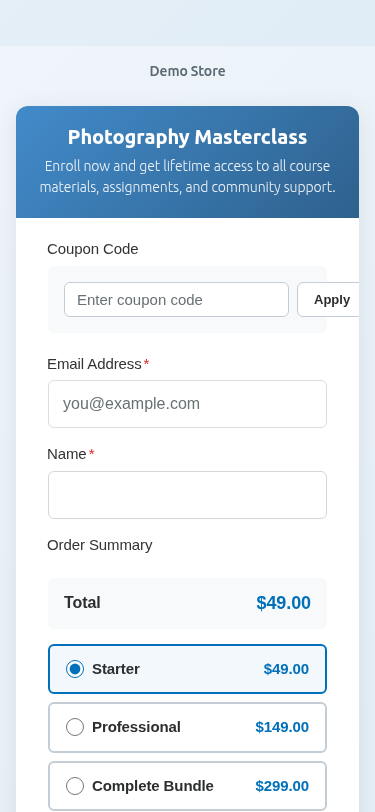
Check:
- Logo scales appropriately
- Remains visible
- Doesn’t overwhelm small screens
Troubleshooting
Logo not appearing
- Verify file uploaded successfully
- Check image URL is valid
- Clear browser cache
- Try a different image format
Logo appears blurry
- Upload higher resolution image
- Use SVG format
- Check original file quality
Logo cut off
- Check image dimensions
- Ensure no excessive padding
- Try different aspect ratio
Logo too large/small
- Adjust source image size
- Try different dimensions
- Preview and adjust
What’s Next?
- Customizing Payment Page Colors – Background colors
- Customizing Payment Page Layout – Layout options
- Enabling Standalone Payment Pages – Full setup guide