Reading time: 4 minutes | Difficulty: Beginner
Overview
WP Payment Pal offers three form display types: Embedded, Overlay, and Payment Page. Each type serves different use cases and provides a unique customer experience.
Prerequisites
- WP Payment Pal installed and activated
- Basic understanding of form creation
The Three Form Types
| Type | Display | Best For |
|---|---|---|
| Embedded | Inline on the page | Product pages, donation sections |
| Overlay | Popup modal | CTAs, space-limited areas |
| Payment Page | Standalone URL | Shareable links, branded checkout |
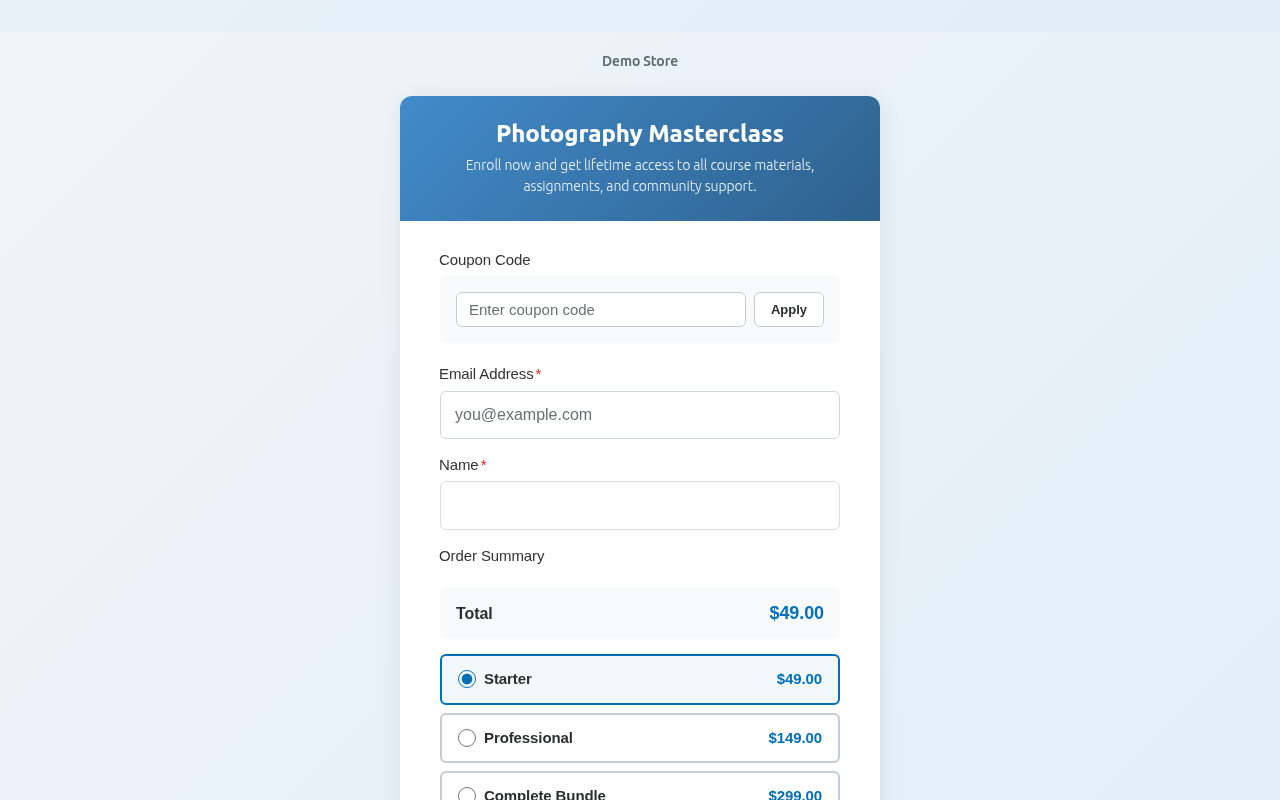
Embedded Forms
Embedded forms display directly within your page content, right where you place the shortcode or block.
Characteristics
- Displays inline with page content
- Adapts to container width
- Always visible to visitors
- No extra click required
Frontend Appearance
Best Use Cases
- Product or service pages
- Donation sections on your homepage
- Course or membership signup pages
- Event registration pages
How to Set Up
- Edit your payment form
- Go to the General tab
- Set Form Type to Embedded
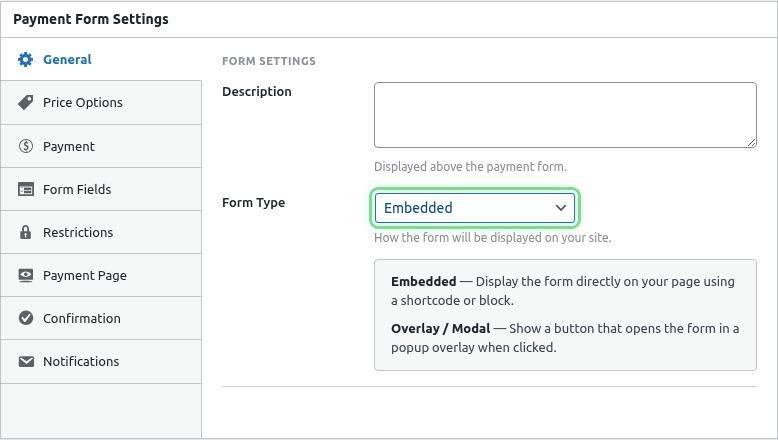
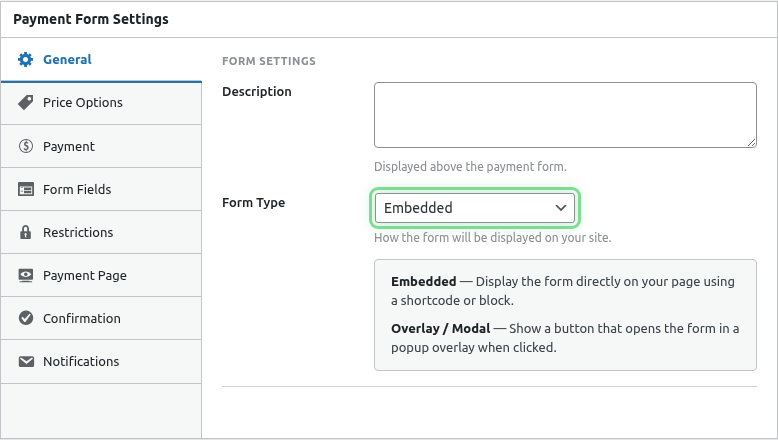
- Publish and embed with shortcode or block
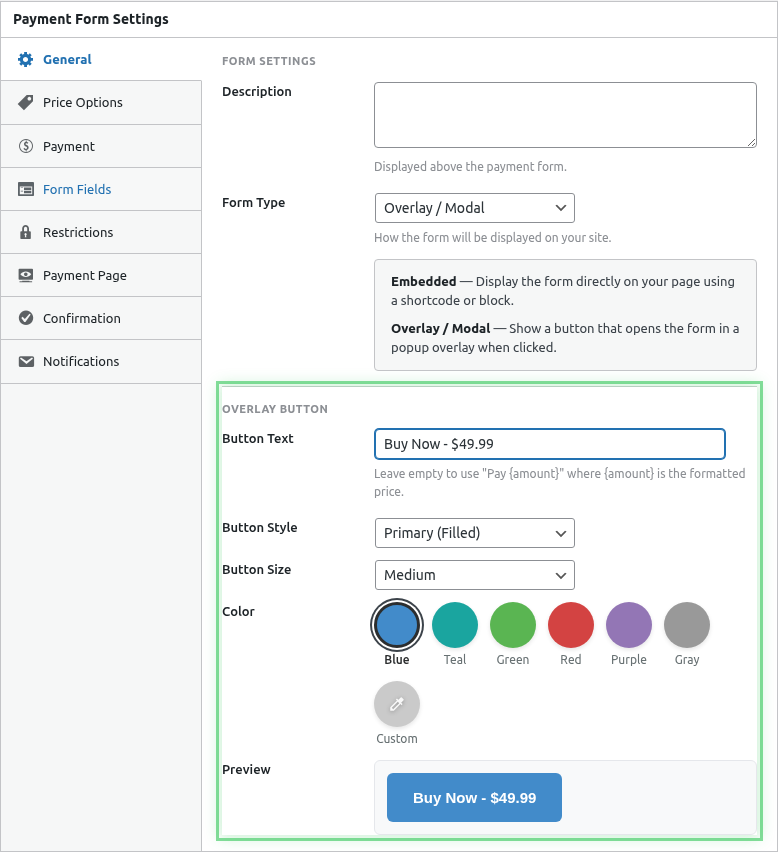
Overlay Forms
Overlay forms display a button that opens the form in a modal popup when clicked.
Characteristics
- Shows a customizable button
- Opens form in a centered popup
- Doesn’t take up page space until clicked
- Can have custom button text and styling
Configuration Options
| Setting | Description |
|---|---|
| Button Text | Text displayed on the button (e.g., “Buy Now”) |
| Button Style | Color and appearance options |
Best Use Cases
- Call-to-action buttons throughout your site
- Multiple payment options on one page
- Sidebar widgets
- Header or navigation areas
- Email campaign landing pages
How to Set Up
- Edit your payment form
- Go to the General tab
- Set Form Type to Overlay
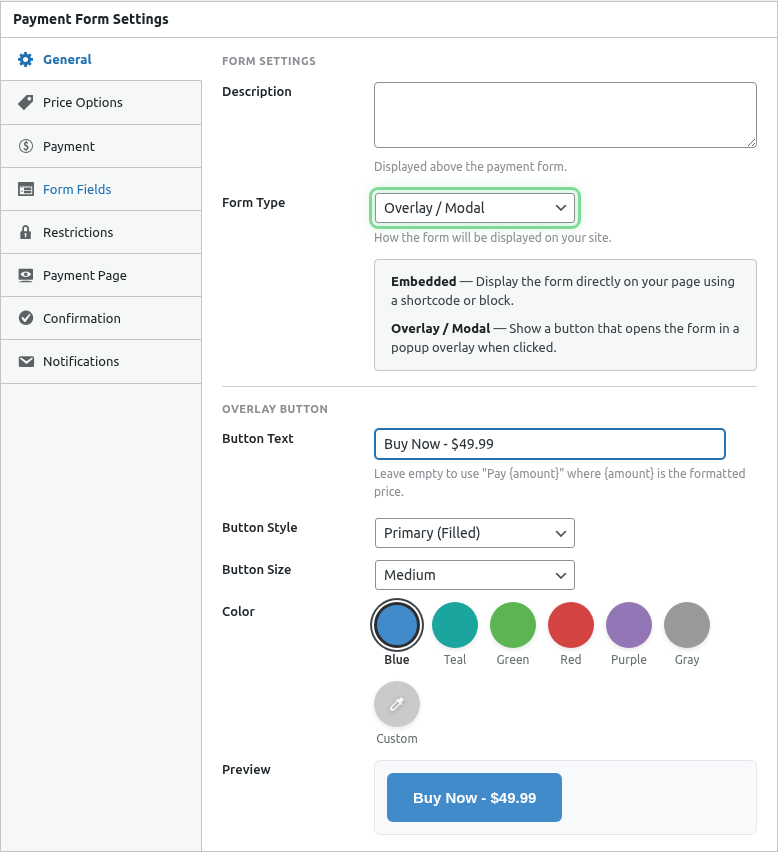
- Configure button text and style
- Publish and embed where needed
Payment Page Forms
Payment Pages create a dedicated, standalone URL for your form with full-page branding options.
Characteristics
- Dedicated URL:
/pay/your-slug/ - Full-page checkout experience
- Custom branding (colors, logo)
- Mobile-optimized design
- Shareable link
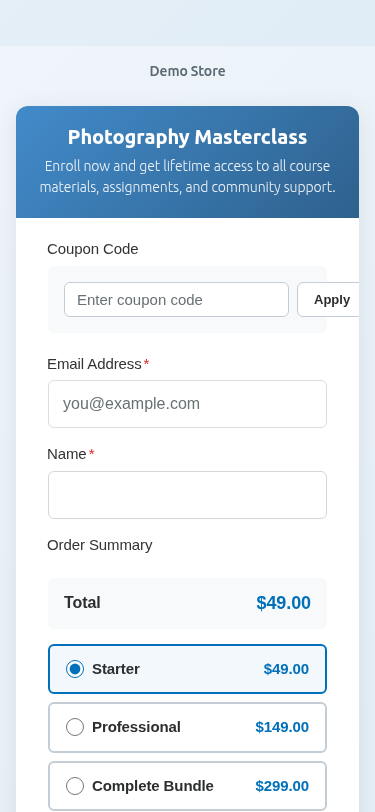
Frontend Appearance
Desktop View:

Mobile View:
Configuration Options
| Setting | Description |
|---|---|
| URL Slug | The URL path (e.g., “donate” = /pay/donate/) |
| Background Color | Page background color scheme |
| Logo | Your brand logo |
| Footer Text | Optional footer content |
Best Use Cases
- Payment links for email campaigns
- Social media payment links
- QR codes for in-person payments
- Invoice payment links
- Standalone checkout experiences
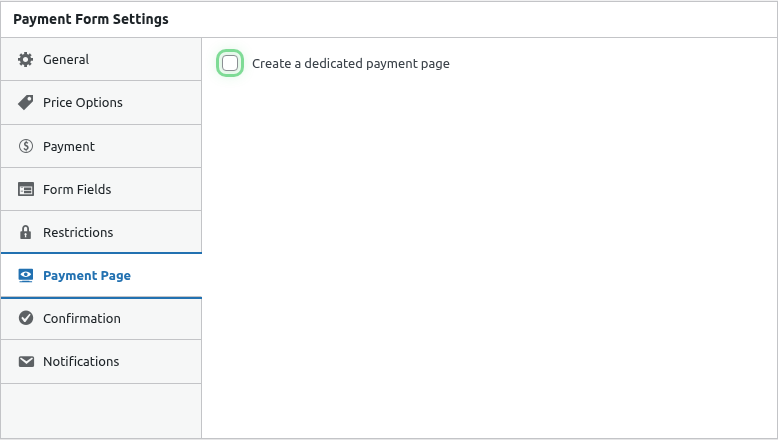
How to Set Up
- Edit your payment form
- Go to the Payment Page tab
- Toggle Enable Payment Page on
- Set your URL Slug
- Customize colors and branding
- Publish the form
Choosing the Right Type
Decision Guide
Need a shareable link?
  └─ Yes → Payment Page
  └─ No → Continue...

Want form always visible on page?
  └─ Yes → Embedded
  └─ No → Overlay
Comparison Table
| Feature | Embedded | Overlay | Payment Page |
|---|---|---|---|
| Inline display | ✓ | ✗ | ✗ |
| Popup display | ✗ | ✓ | ✗ |
| Dedicated URL | ✗ | ✗ | ✓ |
| Custom branding | Limited | Limited | Full |
| Shareable link | Via page URL | Via page URL | Direct URL |
| Space efficient | ✗ | ✓ | N/A |
| Mobile optimized | ✓ | ✓ | ✓ |
Changing Form Types
You can change a form’s type anytime:
- Edit the form
- Go to General tab
- Select new Form Type
- Save changes
Existing shortcodes continue to work – they’ll display the new type automatically.
What’s Next?
- Configuring Form Fields – Add fields to your form
- Enabling Standalone Payment Pages – Payment page details
- Embedding Forms on Your Website – Display options