Reading time: 5 minutes | Difficulty: Beginner
Overview
Create a donation form that lets supporters choose their own contribution amount. This guide covers pay-what-you-want pricing with optional suggested amounts.
Prerequisites
- WP Payment Pal installed
- PayPal account connected
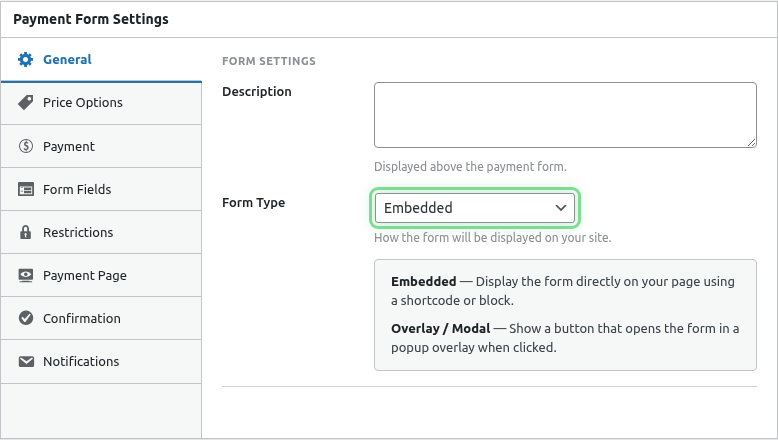
Step 1: Create the Form
- Go to Payment Forms > Add New
- Enter a title: “Support Our Cause” (or your preferred name)
- Add a description explaining the donation purpose
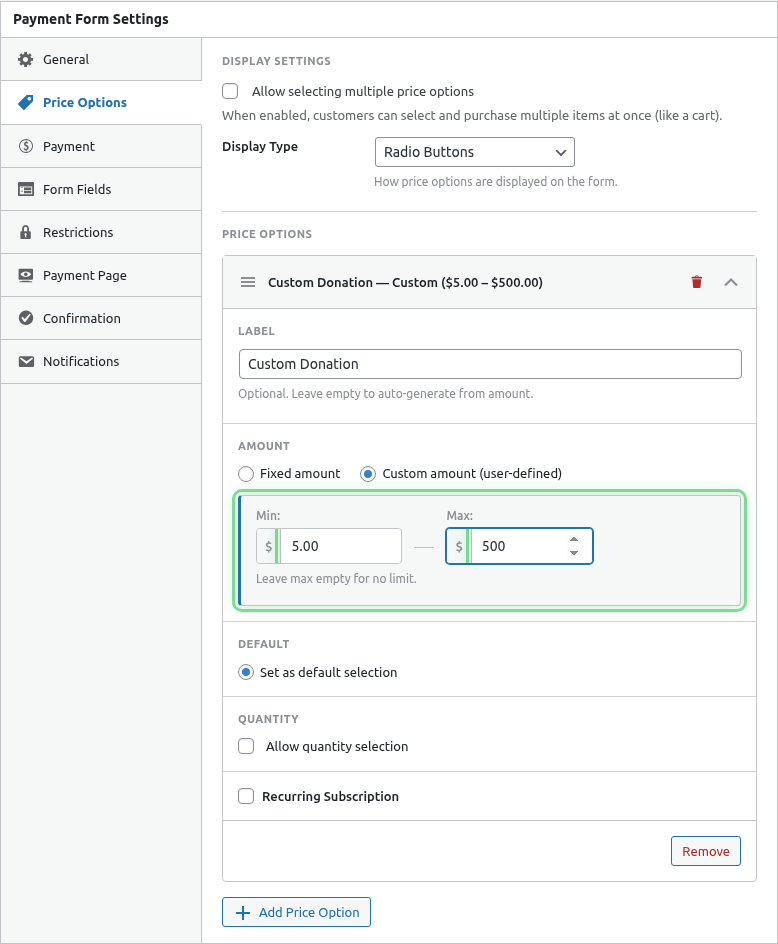
Step 2: Configure Custom Amount
- Click the Price Options tab
- Click Add Price Option
- Enable Custom Amount
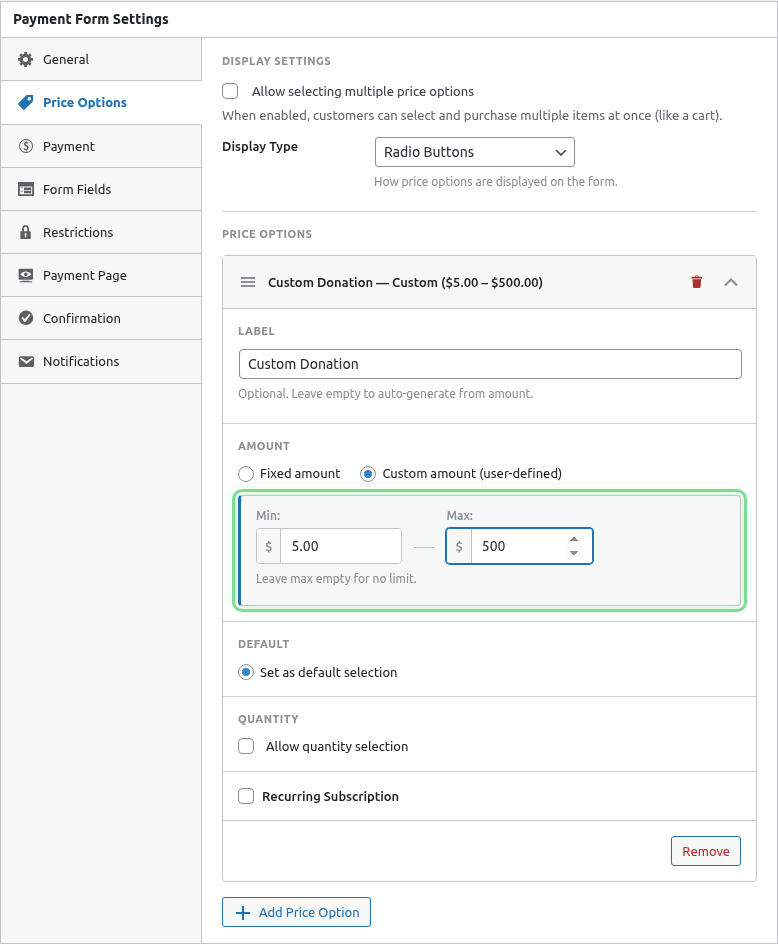
Set Amount Constraints
| Setting | Recommended Value |
|---|---|
| Minimum Amount | $5 (or your minimum) |
| Maximum Amount | Leave empty for no limit |
| Default Amount | $25 (your suggested amount) |
Label Suggestions
- “Choose Your Donation Amount”
- “Enter Donation”
- “Your Contribution”
Step 3: Add Suggested Amounts (Optional)
Help donors decide by offering preset amounts alongside custom entry.
Option A: Suggested Amounts as Options
Add multiple fixed price options:
| Label | Amount |
|---|---|
| Coffee | $10 |
| Lunch | $25 |
| Dinner | $50 |
| Champion | $100 |
| Custom | (Custom amount enabled) |
This gives donors quick selections while allowing custom amounts.
Option B: Custom Only
Use just one custom amount option for maximum flexibility.
Step 4: Add Donor Fields
Click the Form Fields tab and add:
- Customer Name – For thank-you communications
- Email – Required for receipt
- Text field (optional) – “Leave a message” for donor notes
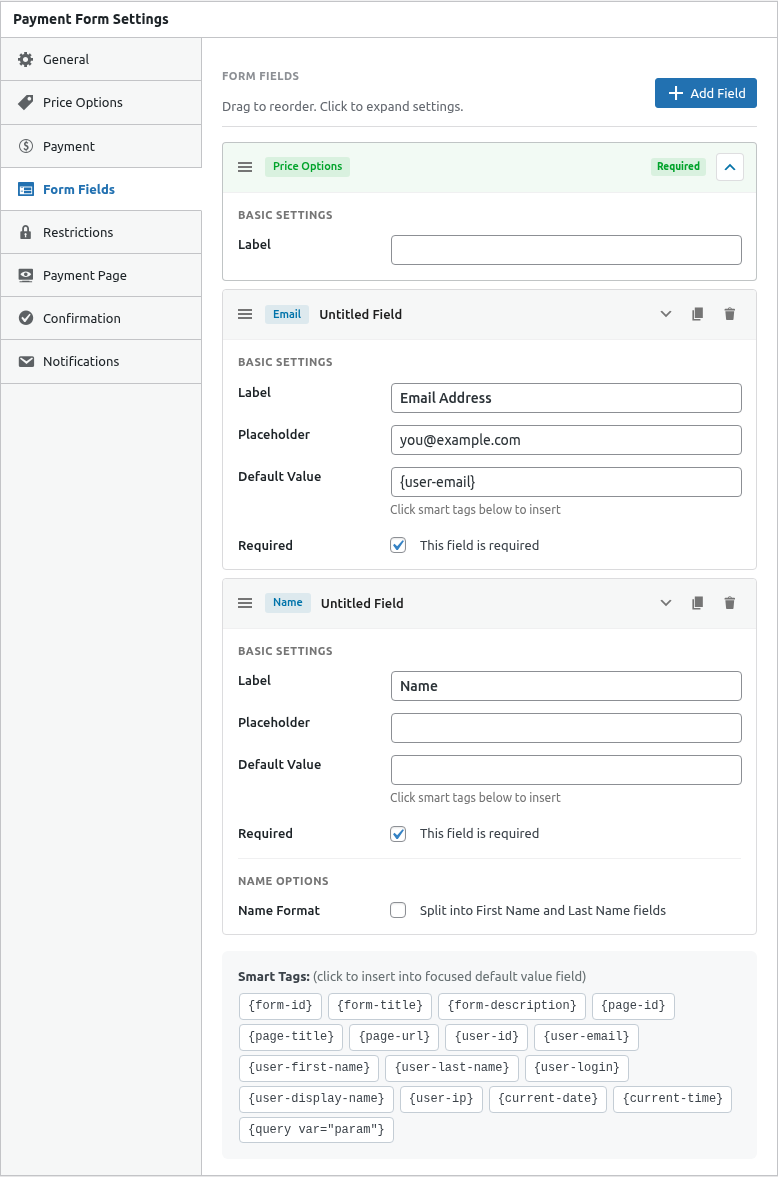
Optional Fields
- Checkbox: “Make this donation in honor of someone”
- Text: “Honoree name”
- Checkbox: “I’d like to remain anonymous”
Step 5: Configure Confirmation
Click the Confirmation tab:
Message Option
Thank donors immediately:
Thank you for your generous donation of {amount}!

Your support makes a real difference. You'll receive a confirmation
email with your tax-deductible receipt shortly.

With gratitude,
[Your Organization]
Redirect Option
Send donors to a detailed thank-you page with:
- Impact stories
- Social sharing buttons
- Newsletter signup
Step 6: Set Up Receipt Email
Click the Notifications tab:
- Enable Customer Receipt
- Customize the subject: “Thank you for your {amount} donation”
- Include tax information in the body
Example receipt body:
Dear {payer_name},

Thank you for your donation of {amount} to [Organization Name].

This email serves as your official receipt for tax purposes.

Date: {date}
Amount: {amount}
Transaction ID: {transaction_id}

[Organization Name] is a registered 501(c)(3) nonprofit.
EIN: XX-XXXXXXX

No goods or services were provided in exchange for this contribution.
Step 7: Publish and Test
- Click Publish
- Embed the form on a page
- Test with Sandbox mode
- Verify receipt email content
Donation Form Best Practices
Compelling Description
Write a brief, emotional appeal:
“Every dollar helps provide meals for families in need.
Your donation today feeds hope for tomorrow.”
Suggested Amounts Strategy
Research shows specific amounts work better than round numbers:
- $27 instead of $25
- $53 instead of $50
- $107 instead of $100
Impact Statements
Show what donations accomplish:
- $25 = One week of meals
- $50 = School supplies for one child
- $100 = One month of tutoring
Recurring Donations
Consider creating a separate subscription form for monthly giving:
Monthly donors provide predictable income.
Frontend Preview
Your donation form will look like this:
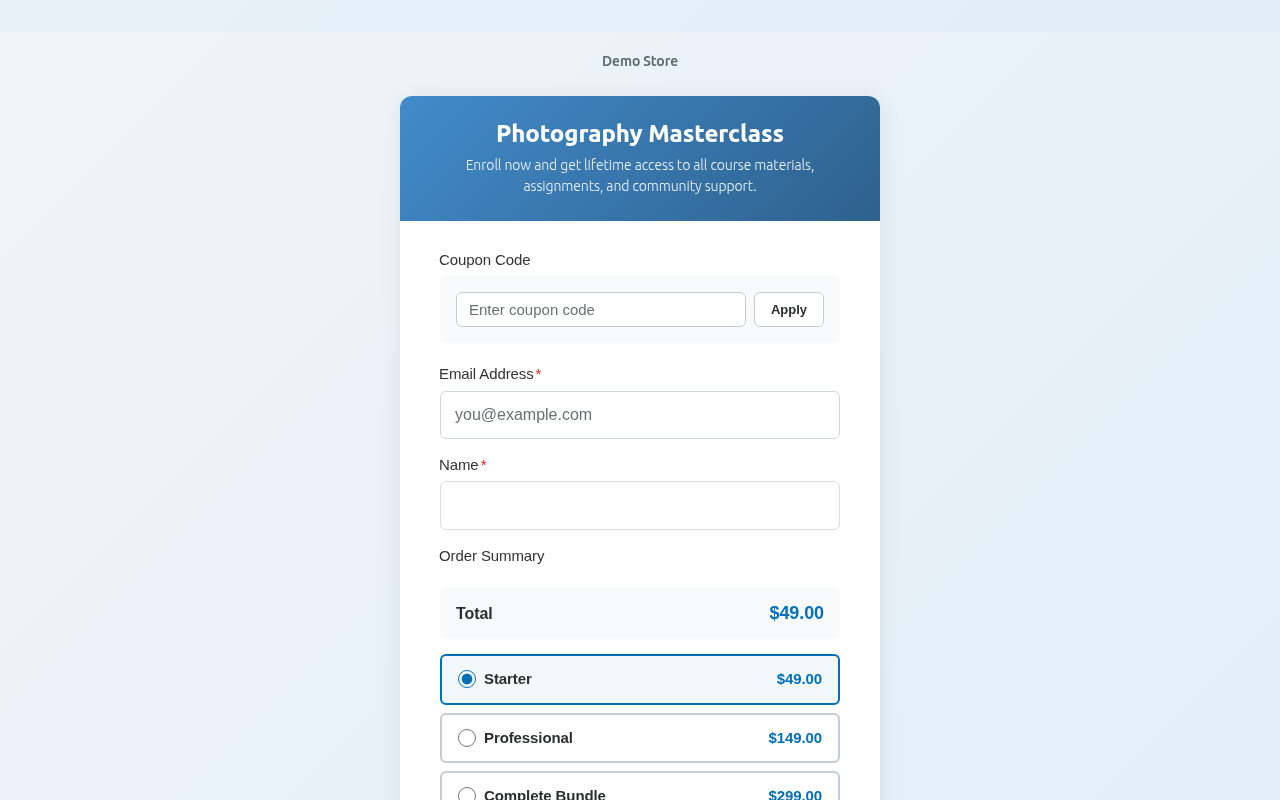
With filled fields:

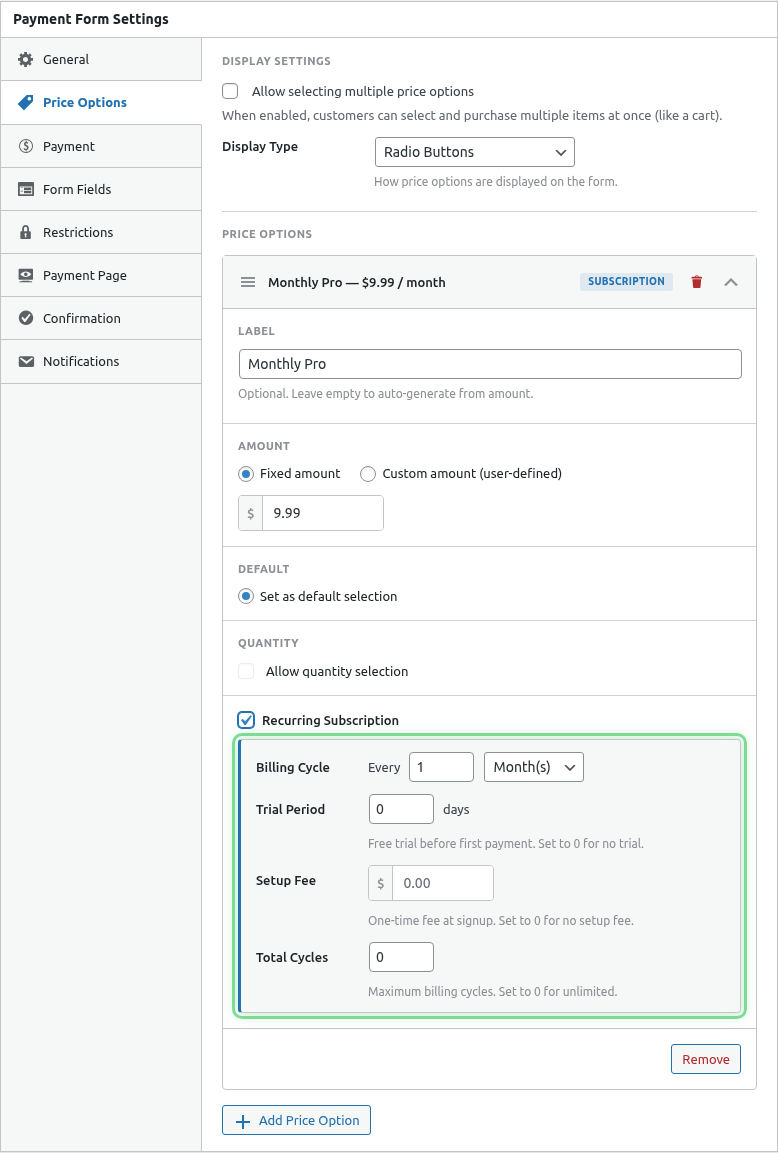
Advanced: Recurring Donations
To accept monthly donations:
- Add a subscription price option
- Set billing interval to Monthly
- Enable Custom Amount on the subscription
- Set minimum monthly amount
This allows donors to choose “Give $X every month.”
Common Questions
Can I set a minimum donation?
Yes! Set the Minimum Amount in the custom amount settings.
Can donors cover processing fees?
Not built-in, but you can:
- Add a checkbox field: “Add $X to cover processing”
- Create a separate price option for the fee amount
- Use multi-select mode
How do I send tax receipts?
Enable the Customer Receipt email and include your organization’s tax ID and a statement that no goods/services were exchanged.
What’s Next?
- Creating a Subscription Plan – Monthly giving
- Configuring Customer Receipt Emails – Receipt customization
- Using Smart Tags in Emails – Dynamic content