Reading time: 3 minutes | Difficulty: Beginner
Overview
Display custom messages to customers immediately after successful payment. This guide covers configuring confirmation messages.
Prerequisites
- A payment form created
- Understanding of your post-payment communication
Accessing Confirmation Settings
- Edit your payment form
- Click the Confirmation tab
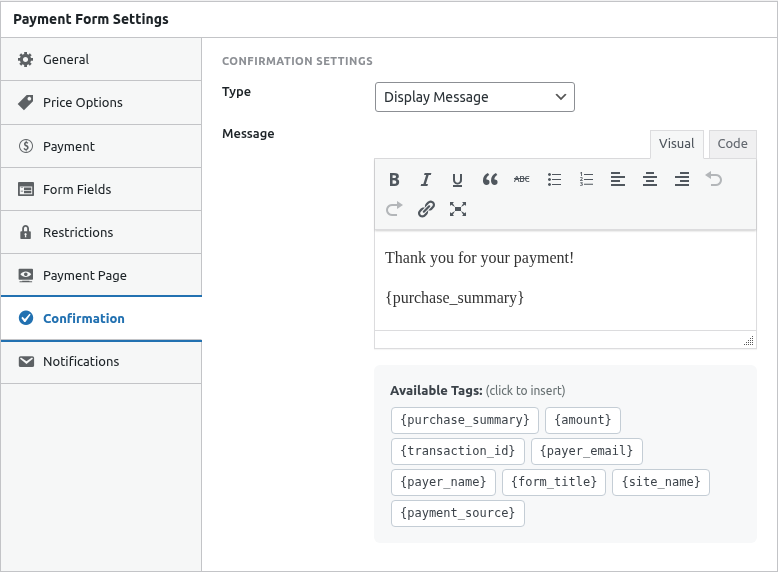
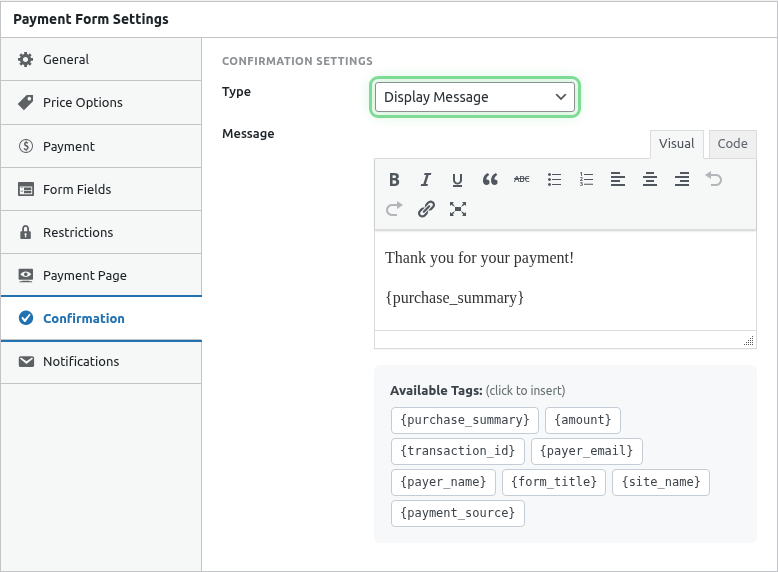
Step 1: Choose Confirmation Type
Select Message to display a confirmation message:
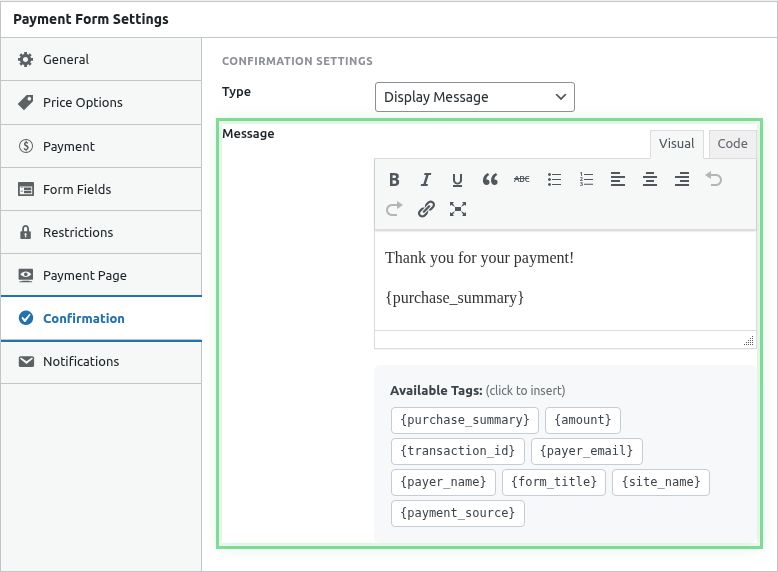
Step 2: Write Your Message
Enter your confirmation message in the text editor:

Basic Message
Thank you for your payment!

Your order has been received and is being processed.
You'll receive a confirmation email shortly.
Detailed Message
Thank you for your purchase, {payer_name}!

Order Details:
- Amount: {amount}
- Transaction ID: {transaction_id}
- Date: {date}

What happens next:
1. You'll receive a confirmation email at {payer_email}
2. Your order will be processed within 24 hours
3. We'll contact you if we need any additional information

Questions? Contact us at [email protected]
Step 3: Format Your Message
The editor supports:
- Bold and italic text
- Bullet points and numbered lists
- Links
- Headings
Using Smart Tags
Include dynamic information with Smart Tags:
| Tag | Displays |
|---|---|
{payer_name} |
Customer’s name |
{payer_email} |
Customer’s email |
{amount} |
Payment amount |
{transaction_id} |
Transaction ID |
{date} |
Payment date |
{form_title} |
Form name |
{field:field_name} |
Custom field value |
See Using Smart Tags in Emails for complete list.
Message Examples
E-commerce Purchase
Order Confirmed!

Thank you for your purchase of {amount}.

Your order number is {transaction_id}.

Shipping Details:
Your items will be shipped within 2-3 business days.
You'll receive tracking information via email.

Need help? Contact us at [email protected]
Donation Receipt
Thank you for your generous donation!

Your gift of {amount} will make a real difference in our community.

A tax receipt has been sent to {payer_email}.

With gratitude,
The Team
Event Registration
You're Registered!

Welcome to the Summer Conference, {payer_name}!

Registration Details:
- Amount Paid: {amount}
- Confirmation #: {transaction_id}

What's Next:
- Check your email for detailed event information
- Mark your calendar for June 15-17
- Join our attendee Facebook group

See you there!
Subscription Welcome
Welcome to Premium!

Hi {payer_name},

Your subscription is now active.

Your Benefits:
- Unlimited access to all content
- Priority support
- Monthly exclusive webinars

Get Started:
Log in to your account to explore your new benefits.

Questions? Visit our help center.
Formatting Tips
Keep It Scannable
- Use short paragraphs
- Include bullet points
- Bold important information
- Clear section headers
Essential Information
Always include:
- Thank you/confirmation
- What was purchased/donated
- What happens next
- How to get help
Avoid
- Excessive text
- Confusing layout
- Missing contact info
- Broken Smart Tags
Testing Confirmation Messages
- Set up your message
- Save the form
- Make a test payment (Sandbox)
- Verify message displays correctly
- Check Smart Tags populate
Message vs Redirect
| Message | Redirect |
|---|---|
| Shows on same page | Goes to different page |
| Quick to set up | More customization possible |
| Good for simple confirmations | Good for complex follow-up |
| Uses Smart Tags | Can pass URL parameters |
See Redirecting After Payment for redirect option.
Combining with Email
Confirmation messages complement receipt emails:
- Message: Immediate feedback
- Email: Permanent record
Both can use similar content but serve different purposes.
Mobile Considerations
Confirmation messages display on mobile:
- Keep width in mind
- Test on small screens
- Ensure readability
Troubleshooting
Message not showing
- Verify Message type selected
- Check message content exists
- Test payment completion
Smart Tags not working
- Check tag spelling exactly
- Use correct format
{tag_name} - Verify data exists for tag
Formatting looks wrong
- Check editor HTML
- Simplify formatting
- Test in different browsers
What’s Next?
- Redirecting After Payment – Alternative confirmation
- Using Smart Tags in Emails – Dynamic content
- Configuring Customer Receipt Emails – Email receipts