Reading time: 3 minutes | Difficulty: Beginner
Overview
Receive email notifications when customers complete payments. This guide covers configuring admin payment alerts.
Prerequisites
- A payment form created
- Admin email address ready
Accessing Admin Notification Settings
- Edit your payment form
- Click the Notifications tab
- Find Admin Notification section
Step 1: Enable Admin Notification
Toggle Send Admin Notification to On.
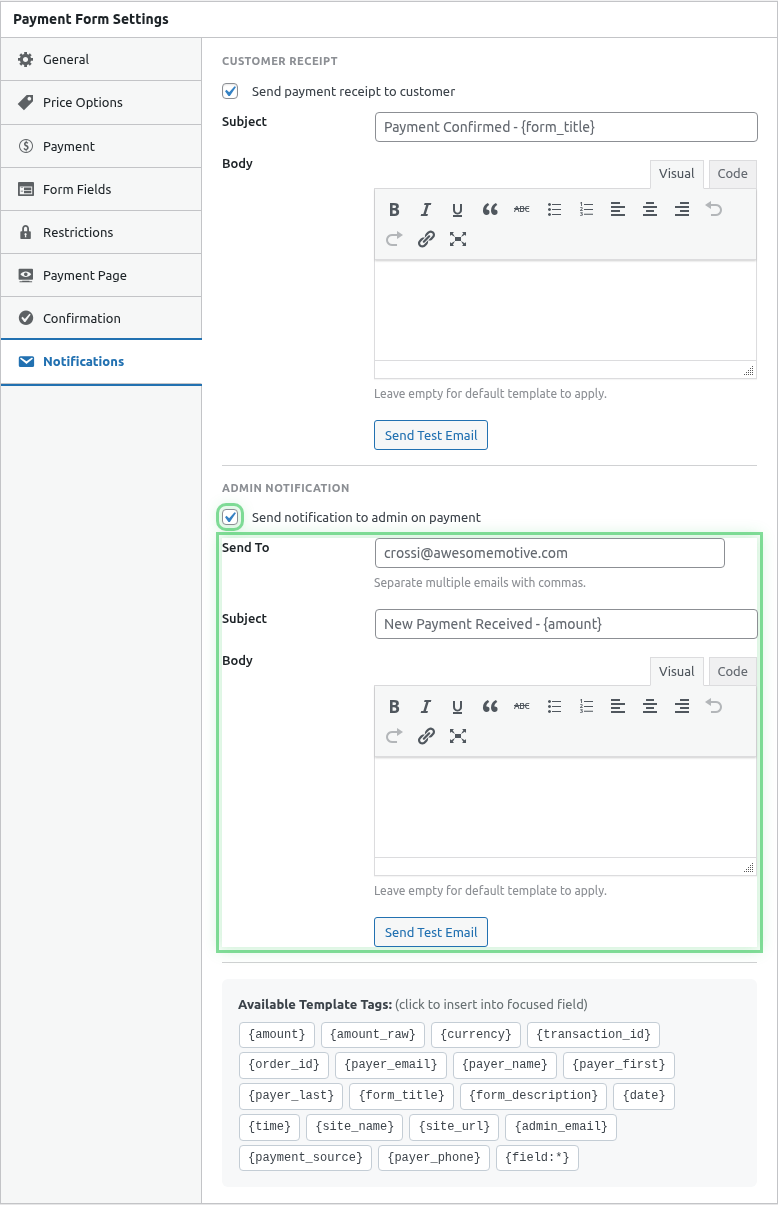
Step 2: Configure Notification Details
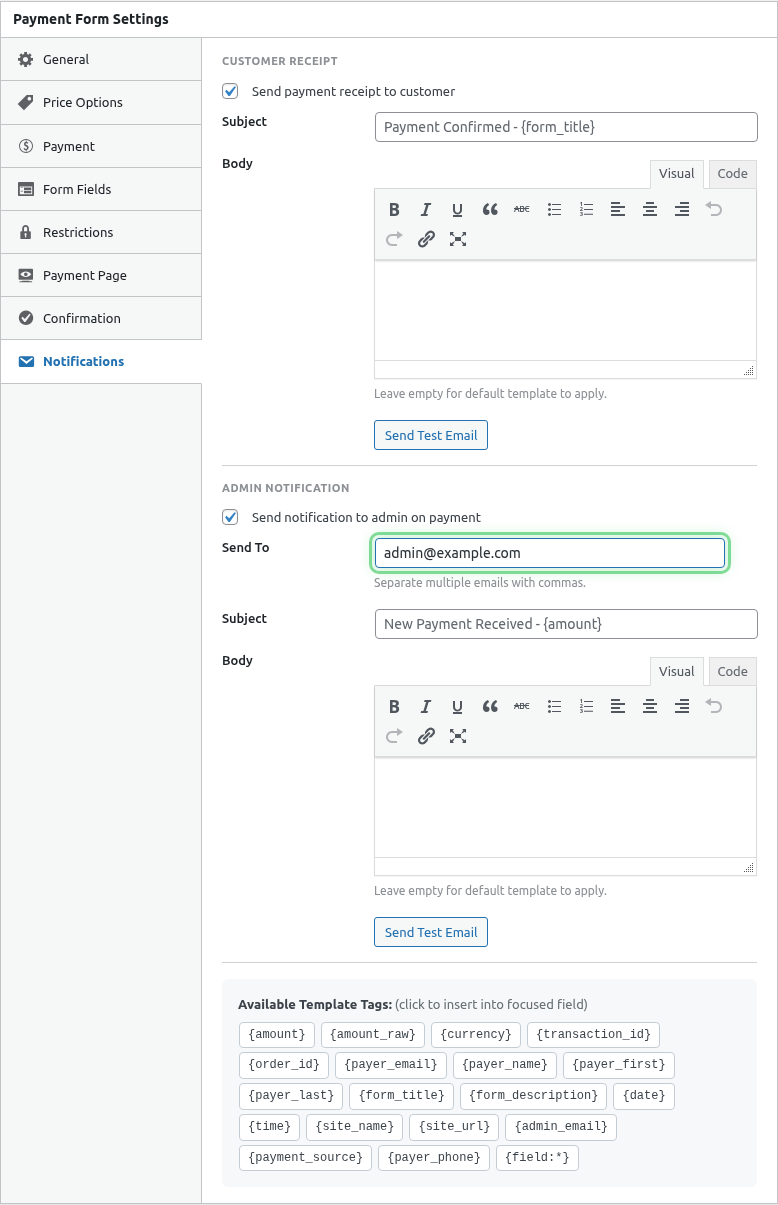
Recipient Email(s)
Enter email addresses to receive notifications:
- Single:
[email protected] - Multiple:
[email protected], [email protected]
Subject Line
Enter a subject that helps you identify payments:
New Payment: {amount} - {form_title}[Payment] {payer_name} paid {amount}💰 New order #{transaction_id}Email Body
Include relevant payment details:
New payment received!

CUSTOMER DETAILS
────────────────
Name: {payer_name}
Email: {payer_email}

PAYMENT DETAILS
───────────────
Amount: {amount}
Transaction ID: {transaction_id}
Form: {form_title}
Date: {date}

FORM RESPONSES
──────────────
{all_fields}

View in admin: [Transaction Link]
Smart Tags for Admin Emails
| Tag | Description |
|---|---|
{payer_name} |
Customer’s name |
{payer_email} |
Customer’s email |
{amount} |
Payment amount |
{transaction_id} |
Transaction ID |
{date} |
Payment date |
{form_title} |
Form name |
{all_fields} |
All form field responses |
{field:field_name} |
Specific field value |
Notification Templates
Standard Payment Alert
Subject: New Payment: {amount} from {payer_name}

───────────────────────────────────
NEW PAYMENT RECEIVED
───────────────────────────────────

Customer: {payer_name}
Email: {payer_email}
Amount: {amount}
Form: {form_title}
Transaction ID: {transaction_id}
Date: {date}

Form Submissions:
{all_fields}
Order Notification
Subject: 🛒 New Order #{transaction_id}

NEW ORDER RECEIVED
──────────────────

Order #{transaction_id}
Amount: {amount}

Customer Information:
- Name: {payer_name}
- Email: {payer_email}
- Phone: {field:phone}

Shipping Address:
{field:address}

Order Notes:
{field:order_notes}

───────────────────
Process this order in your admin panel.
Donation Alert
Subject: ❤️ New Donation: {amount}

NEW DONATION RECEIVED
─────────────────────

A supporter just donated {amount}!

Donor: {payer_name}
Email: {payer_email}
Amount: {amount}
Date: {date}

Donor Message:
{field:message}

Send a thank you!
Service Booking Alert
Subject: New Booking - {field:service_type}

NEW BOOKING
───────────

Service: {field:service_type}
Amount: {amount}

Client Details:
- Name: {payer_name}
- Email: {payer_email}
- Phone: {field:phone}

Requested Date: {field:preferred_date}

Notes: {field:special_requests}

Confirm this booking and contact the client.
Multiple Recipients
Send to multiple email addresses:
[email protected], [email protected], [email protected]Use Cases
- Admin + Sales: Both see new orders
- Admin + Accountant: Payment tracking
- Team distribution: Multiple handlers
Notification Timing
Admin notifications are sent:
- Immediately after successful payment
- Before customer redirect
- In real-time
Per-Form Notifications
Each form can have different:
- Recipient emails
- Subject lines
- Body content
Example Setup
| Form | Recipients | Subject |
|---|---|---|
| Product A | [email protected] | New Product A Order |
| Donations | [email protected] | New Donation |
| Services | [email protected] | New Booking |
Reply-To Configuration
Set reply-to as customer email to easily respond:
- Customer’s email becomes reply-to
- Click reply to contact them directly
Filtering and Organizing
Email Filters
Create email filters/rules to:
- Auto-label payment notifications
- Move to specific folders
- Forward to team members
- Trigger actions
Subject Line Strategy
Use consistent prefixes for filtering:
[Payment] ...
[Order] ...
[Donation] ...
Testing Notifications
- Configure notification settings
- Save the form
- Make a test payment (Sandbox)
- Check your email
- Verify all content is correct
Disabling Notifications
To stop receiving notifications for a form:
- Edit the form
- Go to Notifications tab
- Toggle Admin Notification Off
- Save
Troubleshooting
Not receiving notifications
- Check spam/junk folder
- Verify email address is correct
- Test email server configuration
- Check email deliverability settings
Wrong information
- Verify Smart Tags are correct
- Check field names match
- Test with known data
Too many emails
- Review who needs notifications
- Use email filters
- Consider consolidating forms
Best Practices
- Essential info only – Don’t clutter
- Clear subject – Easy to identify
- Multiple addresses – Backup recipients
- Test regularly – Ensure delivery
- Use filters – Organize inbox
What’s Next?
- Configuring Customer Receipt Emails – Customer emails
- Using Smart Tags in Emails – Dynamic content
- Configuring Email Settings – Global email settings