Reading time: 3 minutes | Difficulty: Beginner
Overview
Send customers to a custom page after successful payment instead of showing an inline message. This guide covers redirect configuration.
Prerequisites
- A payment form created
- A destination page to redirect to
Accessing Confirmation Settings
- Edit your payment form
- Click the Confirmation tab
Step 1: Choose Redirect Type
Select Redirect as your confirmation type (see Setting Up Confirmation Messages for type selection).
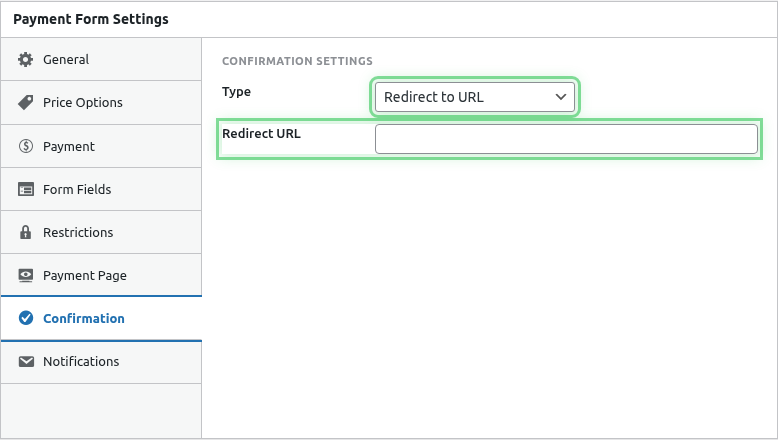
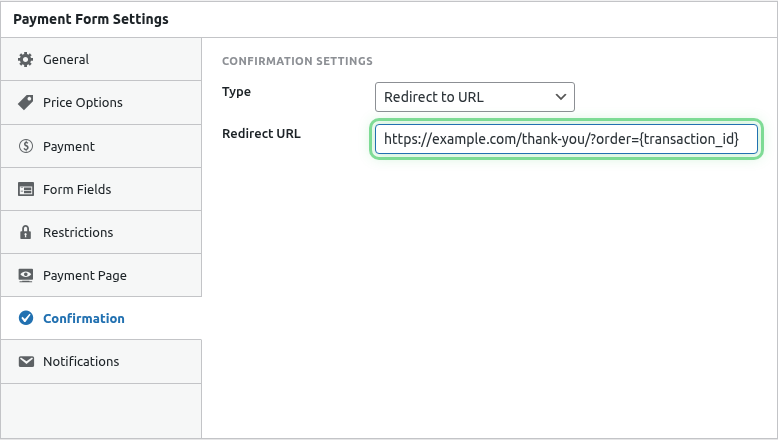
Step 2: Enter Redirect URL
Enter the full URL to redirect customers:
https://yoursite.com/thank-you/Or select a page from your site.
Redirect Options
Internal Page
Redirect to a page on your site:
https://yoursite.com/thank-you/
https://yoursite.com/order-complete/
https://yoursite.com/welcome-member/
External URL
Redirect to another site:
https://app.example.com/onboarding
https://community.example.com/welcome
With Parameters
Pass payment data via URL parameters:
https://yoursite.com/thank-you/?transaction_id={transaction_id}&amount={amount}URL Parameters
Add Smart Tags to pass data:
| Parameter | Example |
|---|---|
?transaction_id={transaction_id} |
Pass transaction ID |
?email={payer_email} |
Pass customer email |
?amount={amount} |
Pass payment amount |
?form={form_id} |
Pass form identifier |
Multiple Parameters
/thank-you/?txn={transaction_id}&email={payer_email}&name={payer_name}Common Redirect Destinations
Thank You Page
Create a dedicated thank-you page with:
- Confirmation message
- Next steps
- Related content
- Social sharing buttons
Member Area
For membership purchases:
- Redirect to member dashboard
- Log in automatically (if configured)
- Show new member resources
Download Page
For digital products:
- Redirect to download page
- Provide file links
- Include access instructions
Onboarding Flow
For subscriptions or services:
- Start onboarding wizard
- Account setup page
- Getting started guide
Course Access
For course purchases:
- Redirect to course start
- Show curriculum
- Begin first lesson
Creating a Thank You Page
Step 1: Create the Page
- Go to Pages > Add New
- Title: “Thank You” or “Order Complete”
- Add your content
Step 2: Design the Content
Include:
- Confirmation header
- Order summary (if using parameters)
- Next steps
- Support contact
- Related offers (optional)
Step 3: Get the URL
Copy the page’s permalink for use in form settings.
Dynamic Thank You Pages
Using URL Parameters
Your page can read parameters:
$transaction_id = $_GET['transaction_id'];
$amount = $_GET['amount'];
Personalized Content
Display personalized messages:
Thank you for your purchase of $[amount]!
Your transaction ID is [transaction_id].
Multiple Forms, Different Redirects
Each form can redirect to different pages:
- Product A → Product A thank you
- Product B → Product B thank you
- Donations → Donation thank you
Redirect vs Message Comparison
| Redirect | Message |
|---|---|
| Custom page design | Form page design |
| Full page control | Limited to message area |
| Can include scripts | No custom scripts |
| SEO for thank you page | No separate page |
| More setup required | Quick to configure |
External Integrations
CRM/Marketing Tools
Redirect to tracking pixels:
/thank-you/?purchase=completeThen track conversions on that page.
Webinar Registration
After course purchase:
https://webinar.example.com/register?email={payer_email}Community Signup
After membership:
https://community.example.com/signup?member={payer_email}Delay Before Redirect
The redirect happens after:
- Payment confirms with PayPal
- Transaction saves locally
- Brief success indication
- Then redirect executes
This ensures the payment completes before redirecting.
Testing Redirects
- Configure redirect URL
- Save the form
- Make a test payment
- Verify redirect happens
- Check URL parameters work
Troubleshooting
Redirect not happening
- Verify Redirect type selected
- Check URL is valid
- Test payment completes fully
- Check for JavaScript errors
Parameters not passing
- Check Smart Tag spelling
- Verify parameter format
- URL encode special characters
- Test in browser
Wrong page displayed
- Verify URL is correct
- Check for redirects in WordPress
- Clear caching
Redirect loop
- Don’t redirect back to form
- Check page doesn’t redirect again
- Verify destination page exists
Best Practices
- Create dedicated page – Don’t use generic pages
- Clear next steps – Tell customers what to do
- Include support – Provide contact info
- Test thoroughly – Verify with real payments
- Track conversions – Add analytics if needed
What’s Next?
- Setting Up Confirmation Messages – Message alternative
- Using Smart Tags in Emails – URL parameters
- Configuring Customer Receipt Emails – Email confirmations