Reading time: 3 minutes | Difficulty: Intermediate
Overview
Limit form access to users with specific WordPress roles. This guide covers role-based access control for payment forms.
Prerequisites
- A payment form created
- Understanding of WordPress user roles
- Users with different roles to test
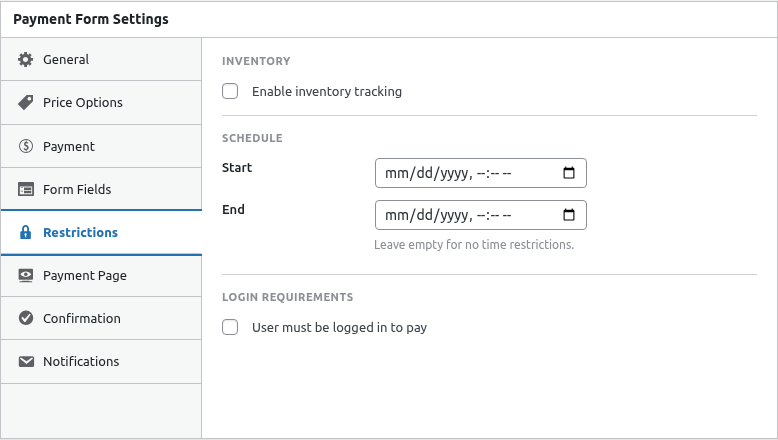
Accessing Role Settings
- Edit your payment form
- Click the Restrictions tab
- Find the User Roles section

Step 1: Enable Role Restriction
- Toggle Restrict by Role on
- Select allowed roles from the list
- Save the form


WordPress Default Roles
| Role | Typical Use |
|---|---|
| Administrator | Full site access |
| Editor | Manage all content |
| Author | Publish own content |
| Contributor | Write but not publish |
| Subscriber | Basic profile access |
How Role Restriction Works
When role restriction is enabled:
- User visits form page
- System checks if logged in
- System checks user’s role
- If role matches → form displays
- If role doesn’t match → restricted message
Common Configurations
Members Only
Allowed Roles: Subscriber, Contributor, Author, Editor, Administrator

Purpose: All registered users can access
Excludes: Anonymous/guest visitors
Premium Members
Allowed Roles: Premium Member (custom role)

Purpose: Special pricing for paid members
Requires: Membership plugin for custom role
Staff Only
Allowed Roles: Editor, Administrator

Purpose: Internal ordering/purchasing
Excludes: Regular subscribers
VIP Customers
Allowed Roles: VIP Customer (custom role)

Purpose: Exclusive products for top customers
Requires: Custom role assignment
Using Custom Roles
Many plugins create custom roles:
Membership Plugins
- WooCommerce: Customer, Shop Manager
- MemberPress: Member levels
- Paid Memberships Pro: Membership levels
LMS Plugins
- LearnDash: Student, Group Leader
- LifterLMS: Student roles
BuddyPress/Community
- Various community roles
Setting Up Custom Roles
To create custom roles, use:
- Membership plugins
- Role editor plugins (Members, User Role Editor)
- Custom code
Custom roles appear in the restriction dropdown.
Combining Restrictions
Role restriction works with:
Login Required (Implicit)
Role restriction automatically requires login:
- Can’t check role of logged-out user
- Login prompt shown first
- Then role check applies
+ Scheduling
Allowed Roles: Premium Member
Schedule: Dec 1-15

Access: Premium members, during December sale only
+ Inventory
Allowed Roles: VIP Customer
Inventory: 50

Access: VIPs only, limited quantity
Restricted Message
Customize what unauthorized users see:
- Find Restricted Message setting
- Enter your custom message
- Save the form
Example messages:
- “This offer is available to Premium members only.”
- “Please upgrade your membership to access this product.”
- “Staff access only.”
Multiple Roles
Users can have multiple roles in WordPress. Access is granted if they have ANY of the allowed roles:
Allowed: Editor, Premium Member
User has: Subscriber + Premium Member

Result: Access granted (has Premium Member)
Viewing User Roles
To check a user’s role:
- Go to Users in admin
- Click on a user
- See their role(s) in the profile
Assigning Roles
Manual Assignment
- Go to Users
- Edit user profile
- Change role dropdown
- Save changes
Automatic Assignment
Use plugins to assign roles based on:
- Purchase completion
- Membership signup
- Form submission
- Manual admin action
Testing Role Restrictions
Test with Allowed Role
- Log in as user with allowed role
- Visit form page
- Verify form displays
Test with Non-Allowed Role
- Log in as user with different role
- Visit form page
- Verify restricted message displays
Test as Logged Out
- Log out
- Visit form page
- Verify login prompt (not form)
Best Practices
- Document roles – Know what each role means
- Test thoroughly – Check all role combinations
- Clear messaging – Tell users how to get access
- Easy upgrade – Provide path to qualifying role
- Regular audits – Review who has what role
Common Patterns
Tiered Access
Form A (Basic): Subscriber+
Form B (Premium): Premium Member
Form C (VIP): VIP Customer

Higher tiers get better pricing/products
Exclusive Launch
Week 1: VIP Customer only
Week 2: Premium Member+
Week 3: All users

Phased rollout by loyalty
Internal vs External
Staff Form: Editor, Administrator
Customer Form: Subscriber, Customer

Separate forms for different audiences
Troubleshooting
User with correct role can’t access
- Verify role is selected in restrictions
- Check user actually has the role
- Clear caching
- Save form and retry
Restriction not working (everyone can access)
- Verify restriction is enabled
- Check roles are selected
- Save form properly
- Test in incognito mode
Custom role not appearing
- Verify role exists in WordPress
- Check plugin creating role is active
- Refresh the form editor
What’s Next?
- Requiring User Login – Login basics
- Scheduling Payment Availability – Time limits
- Customer Subscription Portal – Member portal