Reading time: 6 minutes | Difficulty: Beginner
Overview
WP Payment Pal provides 17 different field types to collect information from your customers. This guide covers all available fields and how to configure them.
Prerequisites
- A payment form created
- Understanding of your data collection needs
Accessing Form Fields
- Edit your payment form
- Click the Form Fields tab
- Use the Add Field dropdown to add fields
Adding Fields
- Click the Add Field dropdown button
- Select the field type you want
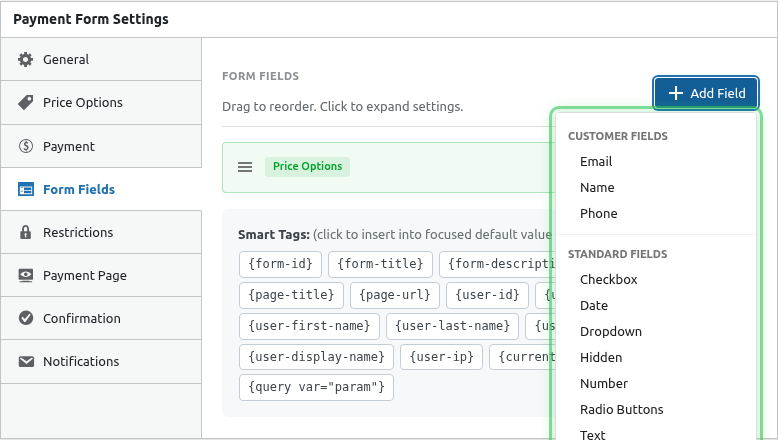
- The field appears in the list
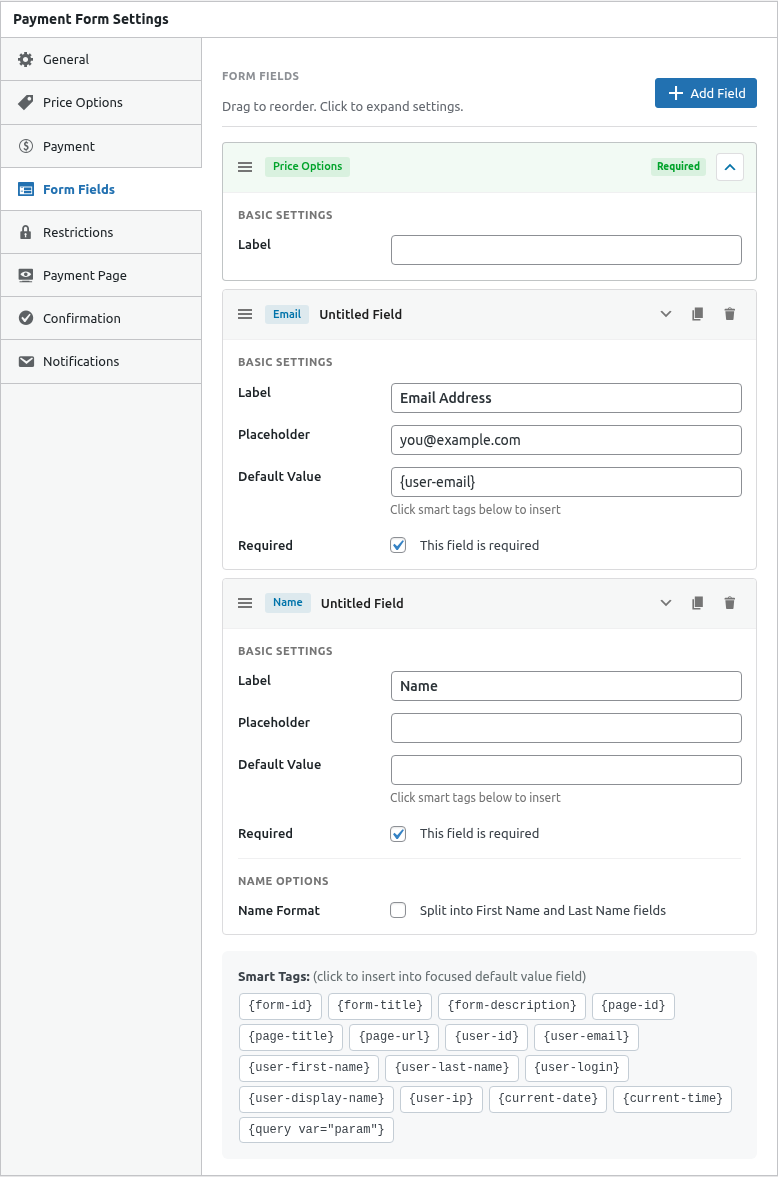
- Click the field to expand and configure it
Field Configuration
Each field has common settings:

| Setting | Description |
|---|---|
| Label | Text shown above the field |
| Placeholder | Hint text inside the field |
| Required | Whether the field must be filled |
| Default Value | Pre-filled value (supports Smart Tags) |
Customer Information Fields
Customer Name
Collects the customer’s full name.
| Option | Description |
|---|---|
| Format | Single field or First/Last name split |
| Required | Usually yes for payment forms |
Collects the customer’s email address with validation.
| Option | Description |
|---|---|
| Required | Almost always yes (needed for receipts) |
| Validation | Automatic email format checking |
Important: The Email field is required for sending payment receipts.
Telephone
Collects phone numbers.
| Option | Description |
|---|---|
| Format | Standard phone input |
| Required | Optional based on your needs |
Standard Input Fields
Text
Single-line text input for any information.
| Option | Description |
|---|---|
| Label | What information you’re collecting |
| Max Length | Optional character limit |
Use cases: Company name, order notes, custom data
Number
Numeric input with optional constraints.
| Option | Description |
|---|---|
| Minimum | Lowest allowed value |
| Maximum | Highest allowed value |
| Step | Increment value (e.g., 1, 0.5) |
Use cases: Quantities, ages, measurements
Checkbox
Single or multiple checkboxes.
| Option | Description |
|---|---|
| Options | List of checkbox choices |
| Required | At least one must be checked |
Use cases: Terms acceptance, add-ons, preferences
Radio
Single selection from multiple options.
| Option | Description |
|---|---|
| Options | List of radio choices |
| Default | Pre-selected option |
Use cases: Size selection, shipping method, preferences
Dropdown
Select menu for choosing one option.
| Option | Description |
|---|---|
| Options | List of dropdown choices |
| Placeholder | “Select…” text |
Use cases: Country selection, categories, options
Date
Date picker for selecting dates.
| Option | Description |
|---|---|
| Format | Date display format |
| Min/Max Date | Date range restrictions |
Use cases: Event dates, delivery dates, booking
Hidden
Stores data without displaying to customers.
| Option | Description |
|---|---|
| Value | The hidden value (supports Smart Tags) |
Use cases: Tracking codes, referral IDs, form identification
Payment-Specific Fields
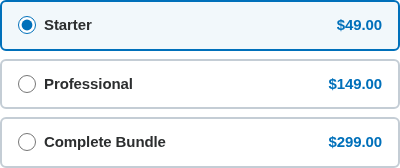
Price Options
Displays the pricing options configured in the Price Options tab.
| Option | Description |
|---|---|
| Display Style | How options are presented |
This field automatically shows your configured prices.
Coupon
Allows customers to enter discount codes.
| Option | Description |
|---|---|
| Placeholder | Hint text (e.g., “Enter coupon code”) |
Only shows if coupons are enabled for the form.

Order Summary
Displays the payment total with line items.
| Option | Description |
|---|---|
| Show Line Items | Display individual items |
| Show Discounts | Show coupon savings |

Organizing Fields
Reordering Fields
Drag and drop fields to reorder them:
- Hover over a field
- Click and drag the handle on the left
- Drop in the new position
Deleting Fields
- Expand the field
- Click the Delete button
- Confirm deletion
Smart Tags in Default Values
Use Smart Tags to pre-fill fields dynamically:
| Tag | Description |
|---|---|
{user-email} |
Logged-in user’s email |
{user-first-name} |
Logged-in user’s first name |
{user-last-name} |
Logged-in user’s last name |
{form-id} |
Current form ID |
{form-title} |
Current form title |
{query var="param"} |
URL parameter value |
Example: Pre-fill email for logged-in users:
- Default Value:
{user-email}
Required vs Optional Fields
Always Required
- Email – Needed for receipts
- Price Options – Customers must select what to pay for
Usually Required
- Customer Name – For payment records
Typically Optional
- Phone – Unless needed for delivery
- Custom fields – Based on your needs
Best Practices
- Keep it minimal – Only ask for necessary information
- Email first – Put Email field early for abandoned cart recovery
- Logical order – Name, Email, then custom fields, then payment
- Clear labels – Use descriptive, unambiguous labels
- Helpful placeholders – Show example formats
What’s Next?
- Setting Up Price Options – Configure pricing
- Using Smart Tags in Emails – Dynamic content
- Adding Coupon Fields to Your Form – Enable coupons